*Materials
2 stands of worsted weight yarn held together
* Size 11 needles, or size needed to get gauge
* Stitch marker and small stitch holder
9 stitches and 20 rows to 4inches in garter stitch
K: knit, P: purl; K1: knit 1 stitch, P1: purl 1 stitch;
Sts: stitches; tog: together
Finished mittens are 9.75” long and 4 1/2 ” wide.
Cast on 24 sts in A.
K1, P1 for 1st row. (right side)
Continue in rib pattern (K1, P1) until cu! measures 2.5”, ending with a
wrong side row.
K one row, dec 3 sts evenly across sts by knitting two sts tog 3 times,
like this: K3, k2tog, (k6, k2tog) twice, k3 (21 sts)
Continue in garter stitch for 9 more rows.
For left thumb, insert a marker in the 10th stitch to indicate thumb.
For right thumb, insert a marker in the 12th stitch.
K one row, increasing (see suggestion below) on either side of stitch
marker. (23 sts)
K one row.
K one row, increasing on either side of stitch marker. (25 sts)
K one row.
K to 3 sts before marker, place next 7 sts on a small holder (this holds
the increased thumb sts and one stitch on either side). Join to
remaining sts and continue knitting row leaving stitch holder in front
of the work. (18 sts)
For stripes:
Switch to Color B, knit 6 rows.
Switch to Color A, knit 4 rows.
Switch to Color B, knit 6 rows.
Continue in garter stitch until mitten measures 9”, ending with a
wrong side row.
K2 tog across row. (9 sts)
Use a darning needle to pull yarn through remaining sts, gathering
tightly to close.
thumb shaping:
Using Color A, pick up 1 stitch before thumb sts on holder (knit
through the back of the loop to avoid holes). Knit across 7 thumb sts
from holder, and pick up 1 st after thumb sts. (9 sts)
Continue in garter stitch for 7 rows.
K2tog at beg and end of next two rows. (5 sts)
Use a darning needle to pull yarn through remaining sts, gathering
tightly to close.
finish:
Sew seam of thumb together with the mattress stitch. Weave in all ends.
Return to top of mitten and sew seam of mitten closed using the mattress stitch. Use Color A to sew the seam of the mitten done in Color A . Use Color B to sew the seam of the mitten completed in Color B.
Weave in all ends.
Block.
Thursday, December 18, 2014
Saturday, December 13, 2014
Flowers flowers everywhere
I found this pattern years ago and I love it for a cute little accent.
So here's an easy pattern to use over and over again.
CO 40 sts
Row 1: K1, BO 6 (you should have 2 sts on your right needle)
K1, BO off 6 (you should have 4 sts on your right needle) K1, BO off 6 (you should have 6 sts on your right needle) K1, BO off 6 (you should have 8 sts on your right needle) K1, BO off 6 (you should have 10 sts on your right


Friday, November 7, 2014
Kimono Poncho...err I mean Cabled Cardi
I found this picture online for an awesome poncho but sadly the pattern was in Japanese and it looks a little small so I'm recreating it so I can knit one myself.
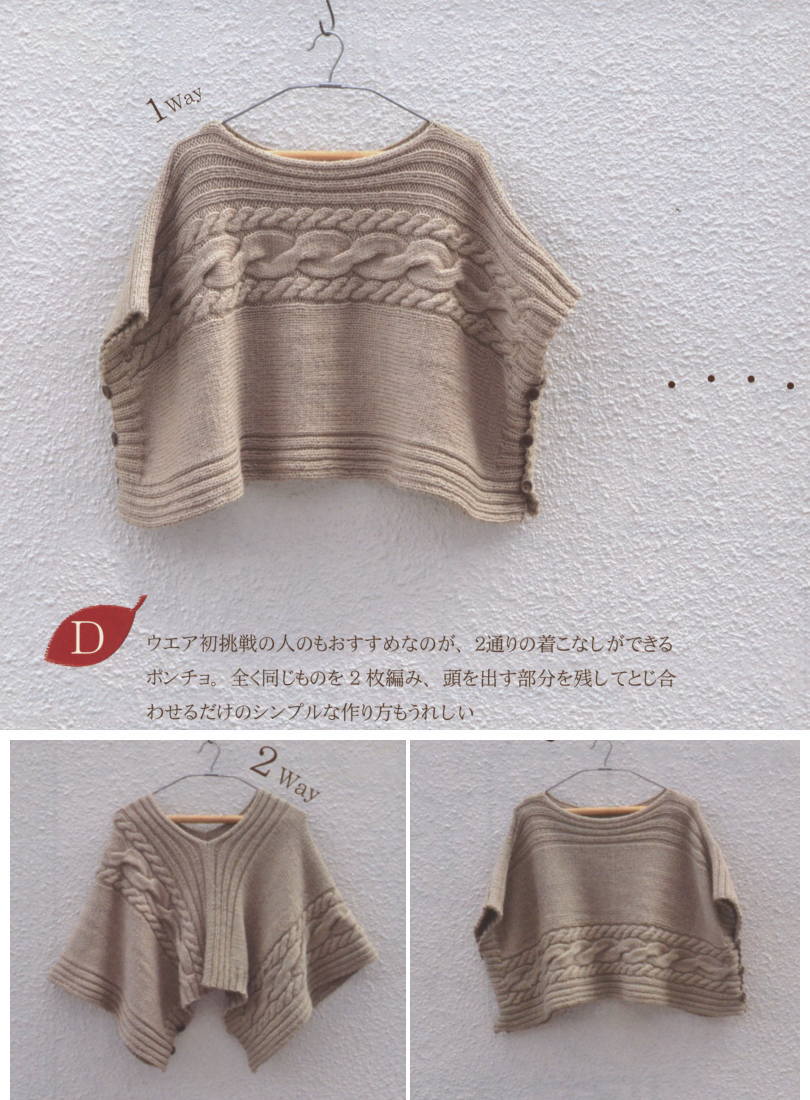
So far this is what I have planned out.
CO 90
Ribbing: K2 P2 for 12 rows
Cable Pattern
K6 P2 K10 P2 K6
Slip 3 sts onto cable needle to back of piece, K 3 K 3 from cable needle
P2
Slip 5 sts onto cable needle to back of piece, K5, K5 from cable needle
So far this is what I have planned out.
CO 90
Ribbing: K2 P2 for 12 rows
Cable Pattern
K6 P2 K10 P2 K6
Slip 3 sts onto cable needle to back of piece, K 3 K 3 from cable needle
P2
Slip 5 sts onto cable needle to back of piece, K5, K5 from cable needle
P2
Slip 3 sts onto cable needle to back of piece, K 3 K 3 from cable needle
Small cables every 6th row
Large cables every 12th row
K40
K2 P2 for 12 Rows
EDIT:
As of December 10, 2014 this has become a cardigan the stitches are the same but now this will have real sleeves. I didn't think it was practical so I swapped it up a little bit.
Now I changed it around so it's now split the sleeves at 20 inches casted off 40 stitches on the RS and cast on 40 stitches on the WS. When I get to the sleeves this is what needs to be done.
Pick up and knit 2 sts at the center armpit gap, working into the piece two rows below the edge, and pm between them. 46 [50, 54, 62, 68, 74, 82] sts
Work in St st for approx 2 inches.
Dec Rnd: Ssk, knit to last 2 sts, k2tog. 2 sts dec.
Rep Dec Rnd every 12 rnds until sleeve measures 17 inches or 2 inches shorter than desired length.
Change to smaller needles. Work 2 inches in K1 P1 rib and BO in patt.
Rep with other sleeve.
Sunday, November 2, 2014


Friday, October 31, 2014
Do you want to build a snowman?
I wanted to so I did.
I'm saving the pattern in case I need to build him again.
Cast on 68 stitches (made for husbands huge noggin)
Knit hat :)
 Now the hard part to knit all the little bits
Mouth,
Cast on 6 with black yarn 6 with white and 6 more with black yarn.
Decrease both sides every knit row for, bind off 8 on last row.

Nose
Cast on 5 with orange yarn
Dec one stitch every other row.
Bind off 1 stitch

Eyes
Cast on 18 stitches (black yarn) using DPN attach don't twist
Knit all rows in white yarn
Row 1 Knit
Row 2 Knit 4 k2g *rep to end
Row 3 Knit
Row 4 dec row knit 3 k2g *rep to end
Row 5 Knit
Row 6 Knit 2 k2g *rep to end
Row 7 Knit
Row 8 Knit 1 k2g *rep to end
Row 9 Knit
Row 10 Knit k2g *rep to end
Bind off
 Eyebrows
Chain 8 x2

Head twigs
Chain 10 x3
Sew it all together and wear!


I'm saving the pattern in case I need to build him again.
Cast on 68 stitches (made for husbands huge noggin)
Knit hat :)

Mouth,
Cast on 6 with black yarn 6 with white and 6 more with black yarn.
Decrease both sides every knit row for, bind off 8 on last row.
Nose
Dec one stitch every other row.
Bind off 1 stitch
Eyes
Cast on 18 stitches (black yarn) using DPN attach don't twist
Knit all rows in white yarn
Row 1 Knit
Row 2 Knit 4 k2g *rep to end
Row 3 Knit
Row 4 dec row knit 3 k2g *rep to end
Row 5 Knit
Row 6 Knit 2 k2g *rep to end
Row 7 Knit
Row 8 Knit 1 k2g *rep to end
Row 9 Knit
Row 10 Knit k2g *rep to end
Bind off

Chain 8 x2

Head twigs
Chain 10 x3
Sew it all together and wear!


Tuesday, August 19, 2014


Thursday, July 10, 2014
Clouds and Rainbows
I saw a pattern from Knit Picks of a dishcloth with a cloud and rain drops that was crocheted. Sadly as many times as I've tried I can just not get the hang of crochet but I figured why can't I just knit that.
So that is exactly what I did. I love the little cloud and thought it was adorable but of course when I do it instead of raindrops I needed a rainbow. If you like the Dishcloth pattern and can't crochet. I've added a pattern of my own. I hope you enjoy.
Dishcloth.
Cast on 33
Row 1-4: Knit
Row 5: Knit 3 P to last 3
Row 6: Knit
Repeat Rows 5-6 until finish row 35
Row 35: Repeat Row 5
Rows 37-39: repeat Rows 1-3
Bind off
Finished Approx. 6 1/2 ” x 7” inches. on size 8 needles.
Cloud and Rainbow.
Cloud
Cast on 7 and knit back
k3, yo, k1, knit back
k3, yo, k1, knit back
k3, yo, k1, knit back
Cast off 3, knit to end, knit back
Repeat Pattern another 4 times so you have 5 points.
Rainbow.
I used a multi color yarn and cast on enough stitches for length of color for this yarn it was 6 stitches and I knit 10 rows
I used Sugar and Cream for the dishcloth and the cloud and Red Heart Super Saver Multi for the rainbow.
Saturday, May 3, 2014
Awesome Circuit without the gym
I found this 13 minute workout and wanted to make sure I kept it close. It's actually really good and I can feel it after only a very short time. Perform all for 60 seconds each.
1. Still Arm Hold
Keep your hands at your sides, facing your body.
Raise both arms away from your sides like a bird in flight, keeping a slight bend in the elbows and arms no higher than your shoulders. Hold your arms strong (no sagging shoulders!). You should be able to draw a straight line from fingertip to fingertip.
Hold and maintain posture throughout.

2. Alternating Kicks
Stand in mountain pose with your feet hip-width apart, abs tight.
Kick your right leg out in front of your body and at the same time raise your left arm.
Alternate right leg, left arm-left leg, right arm, keeping legs below the hips as you kick and arms below shoulder height as you reach.

3. Butterfly
Stand feet hip-width apart.
Raise arms with your elbows out to the side and palms facing forward.
This should look like a goal post.
Make a fist and slowly bring your elbows in to touch with knuckles facing away from your face. You should be able to see your manicure.
 4. Knee Lifts
Stand feet hip-width apart.
Lift your right knee as high as you can, but don't go past your waist. Hold for 5 seconds, then lower it. Alternate knees. Stay tall and keep your abs engaged and hips squared.

5. Arm Reach March
March in place.
While marching in place reach both arms up toward the ceiling as you draw in your abs.
Lower arms to shoulder height and reach out to the sides
Alternate reaching both arms up and out while marching

6. Biceps Curl
Stand feet hip-width apart knees slightly bent and weights in each hand. Hold your arms against your sides with your palms facing inward.
Hold your tummy in, and keeping your elbows close to your sides, curl your forearms toward your shoulders so that you can see your manicure. Pause for a second, and then gradually lower your weights back to their starting position.

7. Modified Jumping Jack.
Stand feet hip-width apart.
Step one foot out to the side and tap. At the same time, raise your arms above your head and clap. Return to the starting position and alternate side to side at a steady pace.

8. Sit and Lean
Sit on the edge of a chair, feet hip-width apart, with your abs engaged and your shoulders relaxed.
Raise your left arm above your head and slowly lean to the right until you feel mild tension on your side. Don't lift your butt from the chair or lean forward or backward. Hold for 30 seconds. Return to the upright position.
Switch to the other side. Hold for 30 seconds.

9. Sit and Stand
Sit in the middle of a sturdy chair without arms.
Keep your feet flat on the floor with hands on your thighs closer to your knees.
Lean forward, so that your nose is over your toes, then stand up.
Bend at your hips and slowly lower your weight down while reaching back with your butt and sit back down.

10. Jog Easy in Place
Stand tall and walk moderately in place.
Move to a quicker speed by lifting your feet only an inch or two off the floor for 20 seconds.
Swing your arms from your hips to your shoulders as you jog easy.
Alternate 10 seconds of brisk walking and 20 seconds of easy jogging for a total of 60 seconds.
Feel free to walk forward and back or around the couch or wherever your walk takes you. Then walk to thehall.

11. Wall Pushups
Stand facing a wall with your feet slightly apart and your knees slightly bent. Extend your arms in front of you to the wall with your elbows slightly bent. Keep your abs tight.
Lean forward slightly and place your palms against the wall. Bend your elbows until your nose nearly touches the wall. Push back out to the starting position. (If it is too hard to get your nose to the wall, go a quarter of the way.)

12. Leg Lifts Abduction
Stand feet hip-width apart. Touch only if you need to balance.
Raise your left leg out to the side in a smooth movement while balancing on your standing leg, and return. (No leaning to the side; keep abs tight.) Do 10 times on the same leg.
Switch legs and continue on the other side.

For 3 minutes, march slowly to lower your heart rate. (Change your tunes to a slower tempo.)
1. Still Arm Hold
Keep your hands at your sides, facing your body.
Raise both arms away from your sides like a bird in flight, keeping a slight bend in the elbows and arms no higher than your shoulders. Hold your arms strong (no sagging shoulders!). You should be able to draw a straight line from fingertip to fingertip.
Hold and maintain posture throughout.
2. Alternating Kicks
Stand in mountain pose with your feet hip-width apart, abs tight.
Kick your right leg out in front of your body and at the same time raise your left arm.
Alternate right leg, left arm-left leg, right arm, keeping legs below the hips as you kick and arms below shoulder height as you reach.
3. Butterfly
Stand feet hip-width apart.
Raise arms with your elbows out to the side and palms facing forward.
This should look like a goal post.
Make a fist and slowly bring your elbows in to touch with knuckles facing away from your face. You should be able to see your manicure.
Stand feet hip-width apart.
Lift your right knee as high as you can, but don't go past your waist. Hold for 5 seconds, then lower it. Alternate knees. Stay tall and keep your abs engaged and hips squared.
5. Arm Reach March
March in place.
While marching in place reach both arms up toward the ceiling as you draw in your abs.
Lower arms to shoulder height and reach out to the sides
Alternate reaching both arms up and out while marching
6. Biceps Curl
Stand feet hip-width apart knees slightly bent and weights in each hand. Hold your arms against your sides with your palms facing inward.
Hold your tummy in, and keeping your elbows close to your sides, curl your forearms toward your shoulders so that you can see your manicure. Pause for a second, and then gradually lower your weights back to their starting position.
7. Modified Jumping Jack.
Stand feet hip-width apart.
Step one foot out to the side and tap. At the same time, raise your arms above your head and clap. Return to the starting position and alternate side to side at a steady pace.
8. Sit and Lean
Sit on the edge of a chair, feet hip-width apart, with your abs engaged and your shoulders relaxed.
Raise your left arm above your head and slowly lean to the right until you feel mild tension on your side. Don't lift your butt from the chair or lean forward or backward. Hold for 30 seconds. Return to the upright position.
Switch to the other side. Hold for 30 seconds.
9. Sit and Stand
Sit in the middle of a sturdy chair without arms.
Keep your feet flat on the floor with hands on your thighs closer to your knees.
Lean forward, so that your nose is over your toes, then stand up.
Bend at your hips and slowly lower your weight down while reaching back with your butt and sit back down.
10. Jog Easy in Place
Stand tall and walk moderately in place.
Move to a quicker speed by lifting your feet only an inch or two off the floor for 20 seconds.
Swing your arms from your hips to your shoulders as you jog easy.
Alternate 10 seconds of brisk walking and 20 seconds of easy jogging for a total of 60 seconds.
Feel free to walk forward and back or around the couch or wherever your walk takes you. Then walk to thehall.
11. Wall Pushups
Stand facing a wall with your feet slightly apart and your knees slightly bent. Extend your arms in front of you to the wall with your elbows slightly bent. Keep your abs tight.
Lean forward slightly and place your palms against the wall. Bend your elbows until your nose nearly touches the wall. Push back out to the starting position. (If it is too hard to get your nose to the wall, go a quarter of the way.)
12. Leg Lifts Abduction
Stand feet hip-width apart. Touch only if you need to balance.
Raise your left leg out to the side in a smooth movement while balancing on your standing leg, and return. (No leaning to the side; keep abs tight.) Do 10 times on the same leg.
Switch legs and continue on the other side.
For 3 minutes, march slowly to lower your heart rate. (Change your tunes to a slower tempo.)
Monday, April 28, 2014
Ewenique Yarn
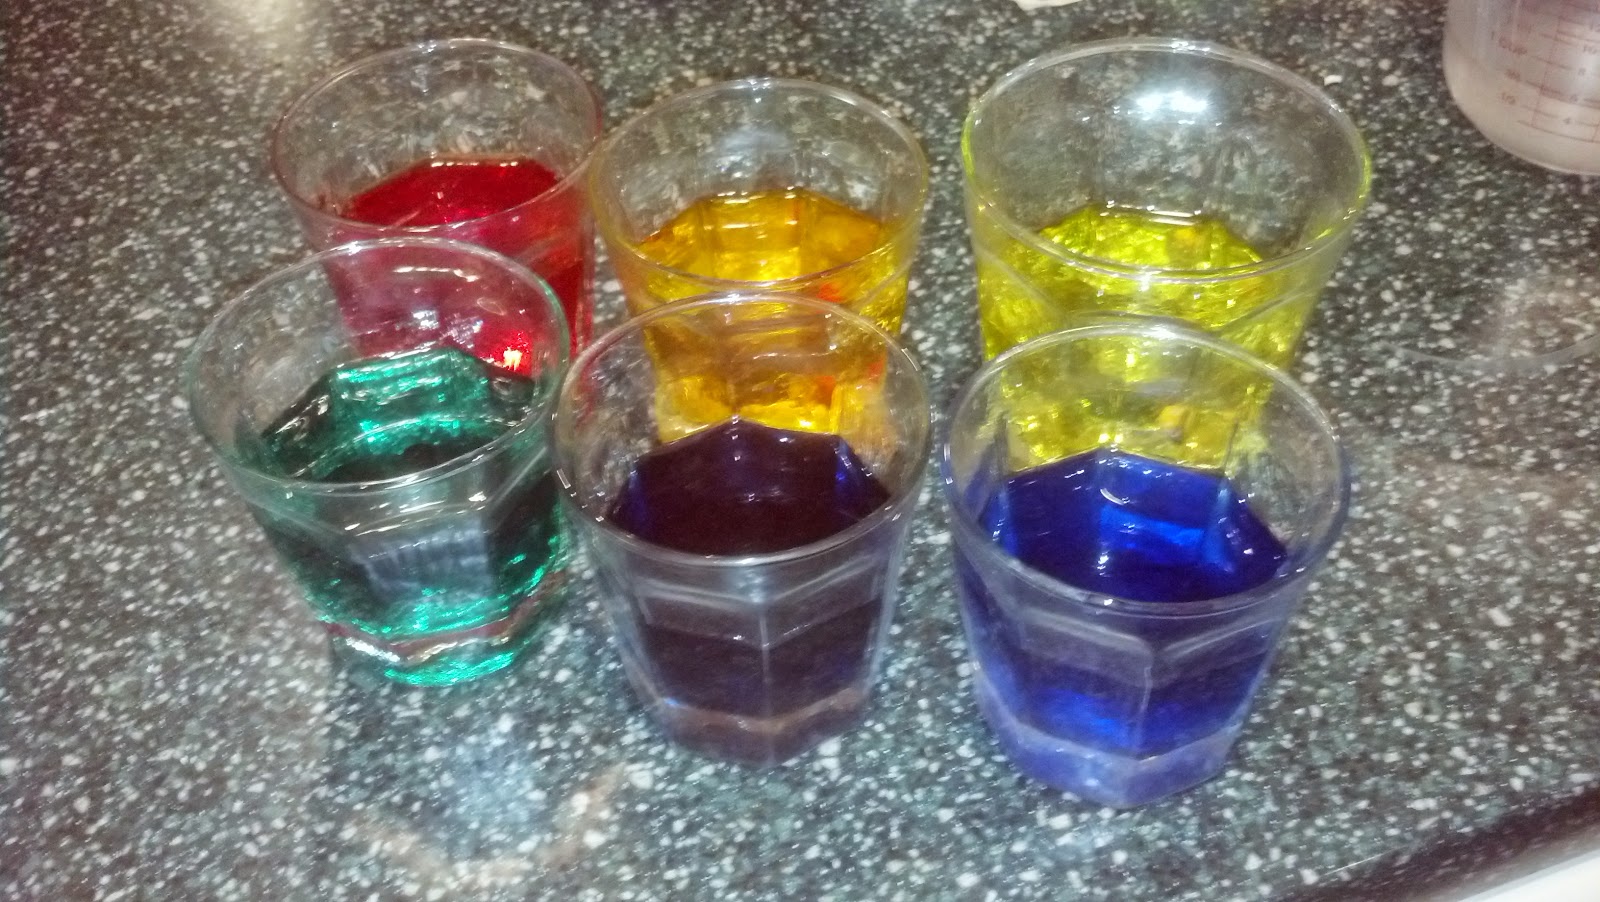
This year Easter was a little different it was spent together as our family of two. I still had a fun day and had to dye eggs and have a nice breakfast when we got up in the morning.
But one thing came out of this day, I saw all of the leftover egg dye and thought wow I know what I can do with that dye. Why not make some pretty yarn. So I did!
I still don't know what I'm going to do with it yet so it may sit in my stash for a little while. But I really can't wait to use it because it's so pretty.
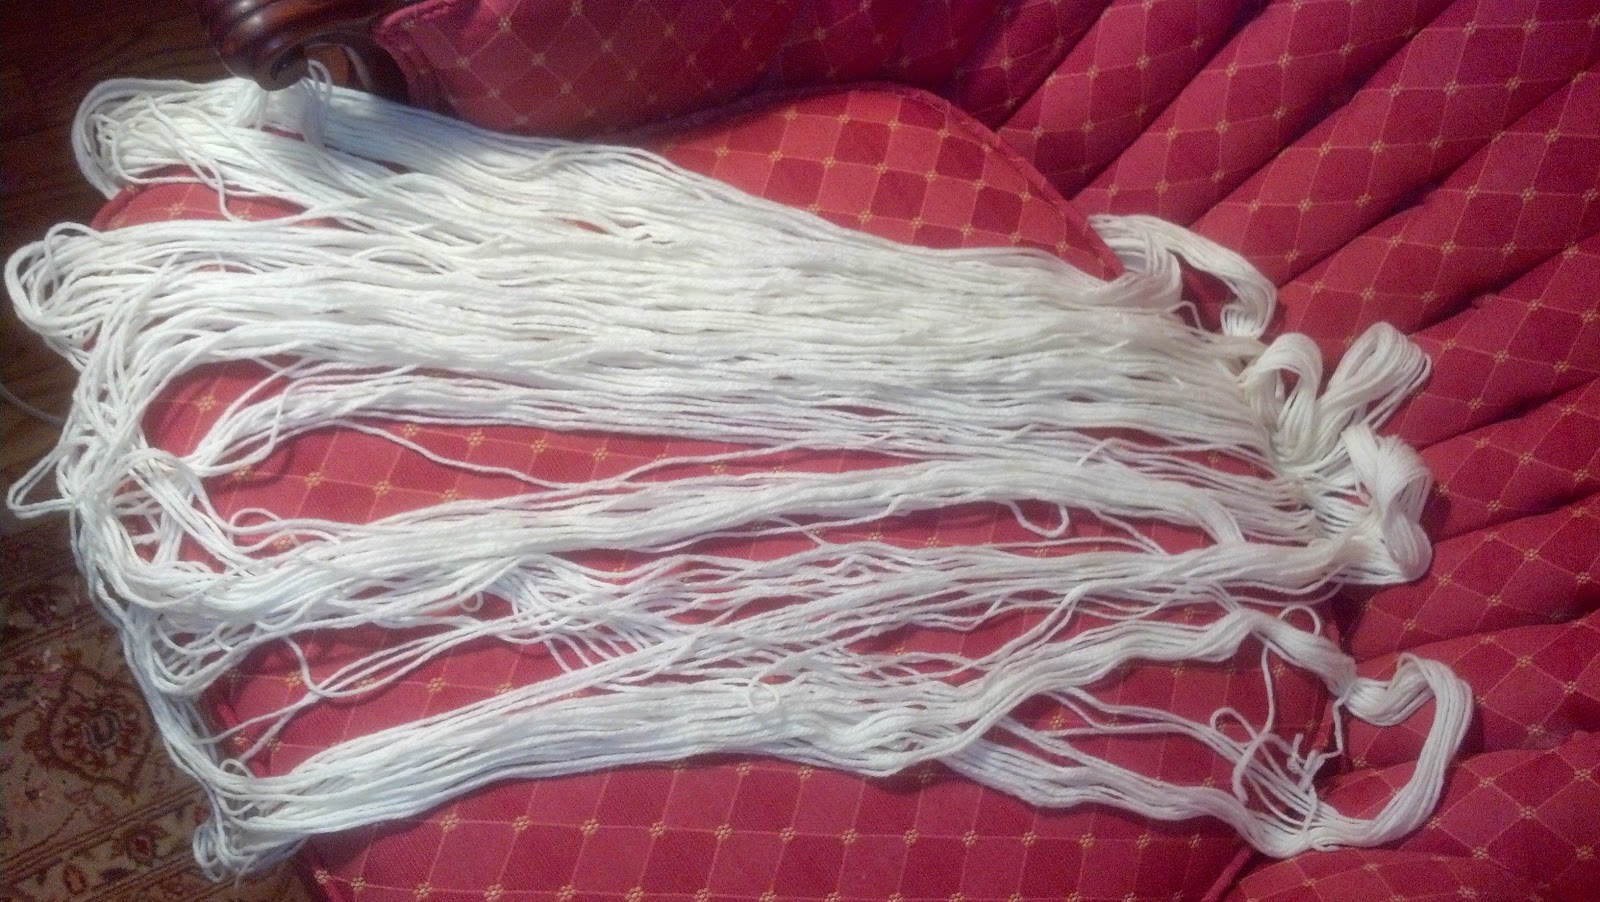
Starting yarn

Naked Yarn ready for the dye
The Dye
In the dye

Out of the bath

Drying in the sun

All rolled up

Final Product

Subscribe to:
Posts (Atom)